
We often like to keep our things spic-and-span. So, why not do the same with our cars, too? A lot of car owners regularly wash their car’s exteriors, while a few might also take the time to further clean their vehicles’ interiors – seating area, dashboard, glove box, transmission lever, rear-view mirror, windows, etc. But, what about other areas, such as under the bonnet (hood)? Yup! That’s where your car’s engine and other components are located (and without which your car is just useless).
However, we’re not going to tell you how to clean your car. We will instead, only focus on sharing a few tips with you, particularly, on how to clean your car engine bay safely and being careful at the same time.
What is the engine bay of a car?
Technically speaking, your car’s engine is installed in a closure referred to as the engine bay. Now, you will need to be very careful when dealing with this compartment area, so you may not want to mess things up.
Now, depending on a car’s make and model, its various components or parts are installed and inter-connected that may appear slightly different than the others. This also means you can’t just pull apart or wire here and there. Everything needs to be done with great care, understanding, and most importantly, patience, of course. You may also refer to your car’s manual/guidebook for assistance, or better, seek help from a professional car mechanic, especially when having to deal with such things.
Your car’s engine bay may often accumulate dust, grime, grease, leaked oil, etc., and if not cleaned properly from time to time, it could also cause unexpected problems. Hence, it is necessary to keep your car’s engine bay free from such dirt. Doing so will also save you money from having to spend on expensive maintenance and repair costs.
Should You Clean Your Car’s Engine Bay?
Well, the short answer to this is, Yes! As already stated above, like many areas of your car, the compartment for the engine’s storage is not immune to dirt and dust. Hence, it will gather dirt and will require some cleaning to be done at some point in time.
However, an important question to ask is how should you clean your car’s engine bay, and without spoiling the other parts? Well, there’s an answer to that as well.
In the following guide, we will provide you with some simple steps which you can perform on your own (aka DIY) and clean your car’s engine bay safely by yourself.
How to Clean Your Car’s Engine Bay by Yourself
Most car owners may simply prefer taking their car to a car wash service center, or perhaps, to a professional car mechanic for cleaning and servicing. But, what if you want to do this task all by yourself? If that’s what you’re thinking, then you must also keep certain things in mind, so that your time, energy, and hard work do not go in vain.
Going forward, here are a few easy steps to help you do a thorough clean-up of your car’s engine bay all by yourself, and using the right tools and supplies. Below we are going to discuss some steps to clean the engine bay from the car.
- Let Your Car’s Engine Cool Down
This first step is very important. Let’s just say you can’t simply open the bonnet and put your hands on the car’s engine while it’s hot, right? It’s only going to give you a nasty burn and regrets. That is why, after having driven your car, give it some time to get cooled properly.
Now, this will depend on how you would want to have your car cooled down – by leaving your car parked overnight at your house and starting with the cleaning the next day. A convenient way for this is to keep your car parked in your garage or outside your house, depending upon the availability of parking space near your home. The idea behind this is to give your car some time to cool down properly before following the DIY cleaning procedure.
- Get your Tools and Supplies Ready
The next step is to make sure you have all the right tools and supplies that you’ll be needing to clean your car’s engine bay.
A few common items which you will require for this purpose are:
- Protective gear for your hands, mouth, and eyes (your safety comes first)
- Wrench (for removing battery cables, bolts, and knots, etc.)
- A shop vacuum, leaf blower, or compressor (anyone should be fine)
- A couple of paintbrushes of different sizes
- Metal wire brush
- Diluted degreaser (for spraying and is easily available in markets)
- A water hose (or preferably a spray bottle for containing liquids)
- Microfibre towels (for wiping and cleaning dry)
So, with all these essential supplies and tools at hand, and having given enough time for your car to cool down, we can now proceed with the steps to clean your car’s engine bay.
- Remove Components Connected to the Engine
Once your car’s engine has cooled down, then you may open your car’s bonnet and carefully disconnect the wires and components, including the battery, from the engine. Also, make sure to cover all those electrical parts with something, like plastic, which should not cause a shock or fire.
While carefully unhooking and removing the necessary components and wires from the engine area, also make sure to check that all liquid reservoir caps, especially of the brake fluid, coolant, etc., are tightly closed. Additionally, to free more space for cleaning, remove the battery after disconnecting both of its terminals, but, also make sure to cover the distributor cap, alternator, filters, spark plugs, coil packs, etc., with a tight seal. You may then remove those seals and covers after you’re done with the cleaning.
Note: This is a very crucial step, therefore, you must be very careful and avoid haste. Any negligence or a wrong act could cause problems to your car and you, as well. Also, make sure to remember what parts you’re removing because when you’ve finished cleaning, you’re going to need to put them back as they were before you opened them. To make it less stressful for you, take snapshots from your smartphone so that you don’t forget the placement of the parts that you want to remove.
- Do the Cleaning
Now that you’ve successfully removed the required components from the engine bay and also taken care of any loose caps and fluid containers, it’s time to proceed with the cleaning.
First, it is suggested to start by clearing away any dry dirt from the surface of the engine bay area. Thus, using those brushes, shop vacuum, leaf blower, or compressor, carefully clean the areas filled with dirt, dust, grime, grease, and dry leaves (if any). This area can usually gather all kinds of dirt both in solid and liquid form. So, using these tools can be effective.
Also, certain parts that are made of metal and aluminum may require you to scrub them, as these parts can often get stained. You can clean these areas with the help of a metal wire brush. However, be cautious and avoid accidentally touching any sensors or hoses.
One by one, finish off with the cleaning.
- Getting your Hands Wet (Wet Cleaning)
In the previous step, we carried out the task of cleaning only the dry dirt from the engine bay area. Here, we are going to clean those areas using water and spraying degreaser in diluted form. It is suggested to use warm water in a spray bottle. A spray bottle is preferred so that you don’t accidentally pour water on other components and parts, including the electrical parts, which could cause them to be spoiled and perhaps, rendering those crucial parts non-functional.
Use the spray bottles, one filled with warm water and the other containing diluted degreaser liquid, for cleaning. Spray warm water over the engine bay to remove any remaining grime and loose dirt. Once done, then use the diluted degreaser spray and let it soak for a couple of minutes. Again, use the spray filled with warm water for effectively rinsing and clearing out the stubborn grease stains and other grime from the surface areas.
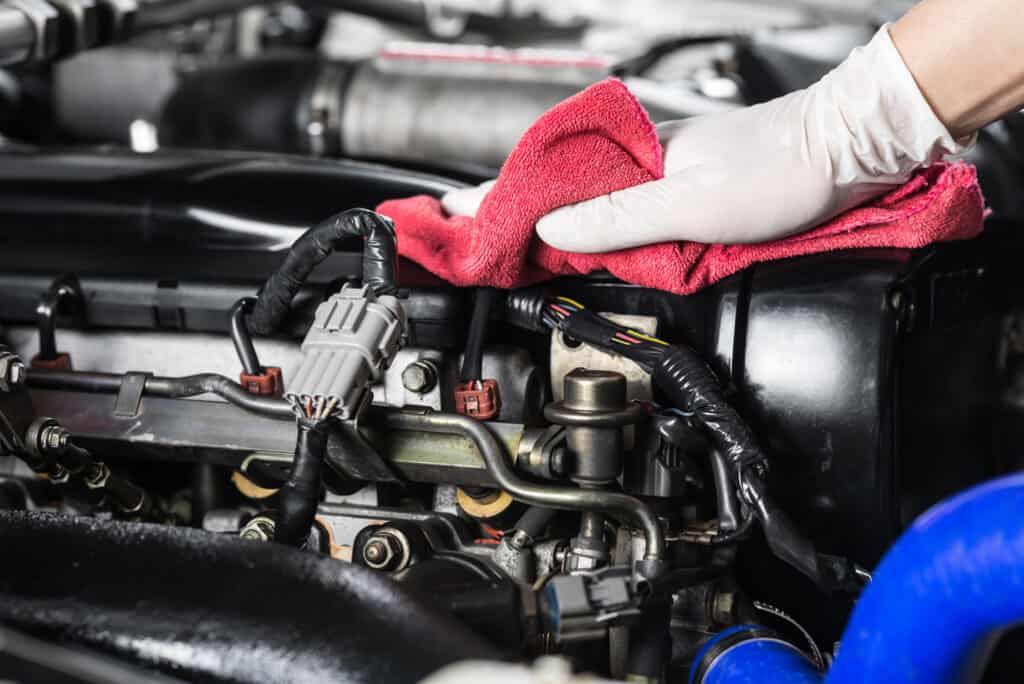
Finally, use the microfibre towels to wipe the surface dry and clean any remaining dirt from the spots and crevices that are within your reach.
Repeat this till you are finally happy and satisfied with the new-ish look of your car’s engine bay (and without causing harm to other parts).
- Okay, Now Put the Parts Back
After you’re done with the cleaning, it’s time to put those components back in the engine bay and tighten up the caps and covers, as you had opened them. If you had followed the guide properly and taken a few snapshots when removing the components, putting them back should be easy.
Closing Words
If you like to keep your favorite car clean and sparkling, you would be concerned about the maintenance under your car’s hood, as well.
As long as you’re comfortable following the steps given above for cleaning your car’s engine bay, everything should go well. Alternatively, there is always the option of taking your car to a service center, in case you don’t want to get your hands dirty.
We hope that you’ve found this DIY guide helpful.
Write A Comment